

Hello there, and welcome back. Today I would like to share a ink-blended galaxy background card with you using Distress inks. This technique isn’t new, but I had never tried it. Besides, my husband bought me some distress inks for Christmas (I still don’t know how he knew I wanted those distress inks so badly) and I thought it’s time for me to come out of my comfort zone and try something new.
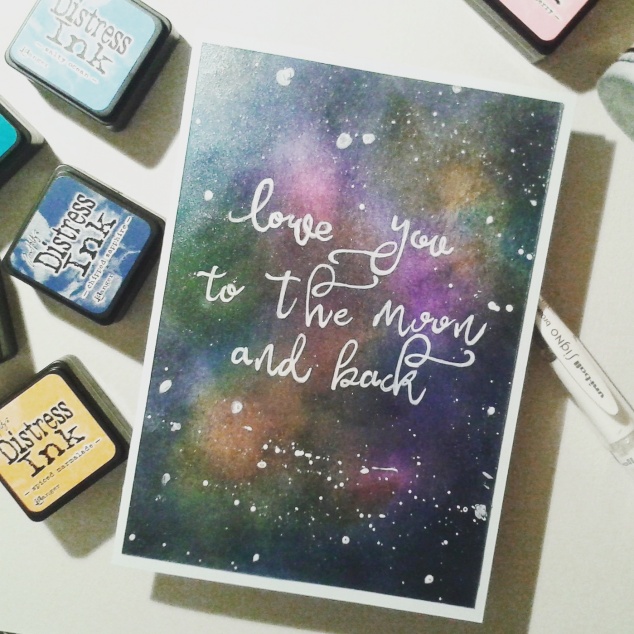
First let me show you the card:
 I used Neenah Solar White card (nice and smooth for ink-blending techniques) and distress inks in these colours (see below), I brought in a purple from Altenew because I don’t have any purple distress ink at the moment.

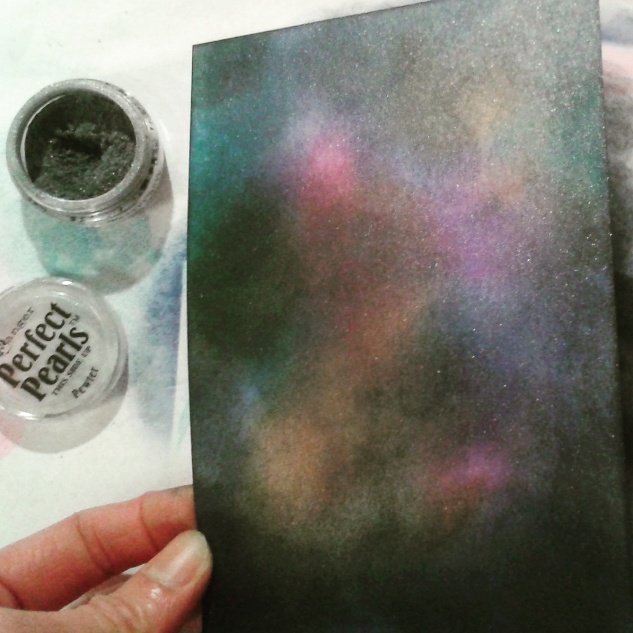
And I just started piling colours on, I put on the colours quite heavily, and went back and forth a few times so the colours could mix and blend into each other. When I finished, the piece looked like a hot mess, I almost trashed it.

To cover up the mess, I brushed on some Perfect Pearls in Pewter, well, that made a big change. The paper looked like metallic paper but with a subtle shine, and the powder eased some of the harsh blending lines off, suddenly it looked very smooth.
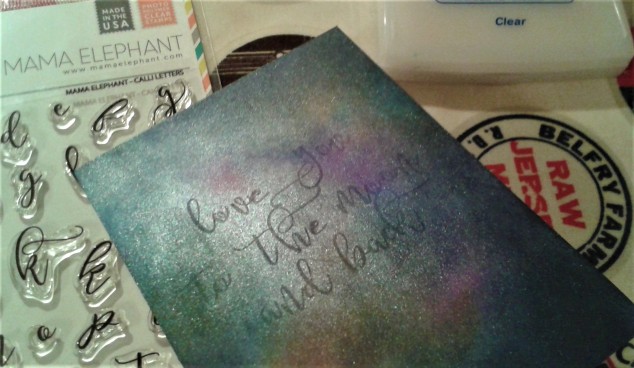
I wanted to write a sentiment on the card but my handwriting is poor. Thanks to Mama Elephant Calli letters set, I was able to fake it. I stamped my sentiment in embossing ink, so I could trace it later with a white gel pen.
I then splattered some white paint all over the card, they looked like stars.
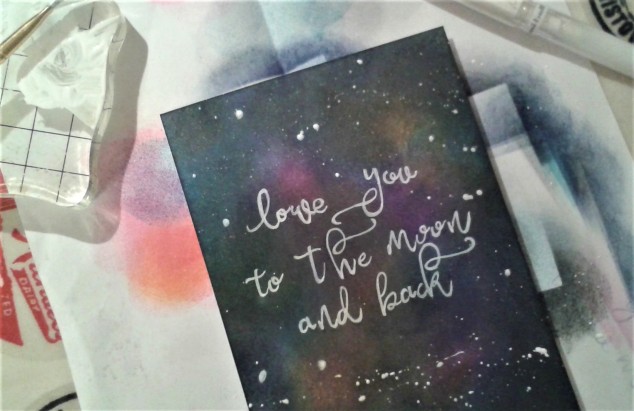
I cropped the piece to be just a little bit smaller than a A6 card then glued it onto the cardbase.
That’s it.
Hope you like this card and give this technique a try. I really enjoyed the process and trying new things.
Thanks for stopping by, have a lovely day!
Yiming
x


